

Every pizza party hits the same bottleneck: one oven, a crowd of hungry people, and dough that needs individual attention at the exact moment everyone wants to eat. If you’ve been searching for “par baked pizza crust” and wondering whether the shortcut compromises quality, here’s the good news: par-baked pizza crust is the professional workaround — you bake the shaped dough most of the way before anyone arrives, then top and finish each pizza in minutes when it’s time to serve. Pizzerias do a version of this for lunch rushes, and it works just as well in a home kitchen: the crust sets its structure early, so the final bake is fast, the bottom stays crisp under heavy toppings, and you can turn out pizza after pizza without the usual chaos.
Done right, par-baking is invisible — guests taste a crisp, fully-baked pizza and never suspect the crust had a head start. Done wrong, you get the sad, crackery base of a frozen supermarket pizza: dry, flavorless, and shattering instead of chewy. The difference is all in the technique: how far you bake, how you cool and store, and how you finish. This guide covers the complete method — when par-baking helps and when it hurts, the step-by-step bake, the party assembly-line system, storage and freezing, and the mistakes that turn a clever shortcut into a disappointment. If you’re starting from raw dough, our pizza dough recipe is the foundation everything here builds on.
🍕 Key Takeaways
- Par-baking means baking shaped, untopped dough at full heat until set and lightly colored — about 70–80% baked — then cooling it completely.
- It’s ideal for parties, thick or heavily loaded pizzas, and make-ahead meal prep; it hurts delicate Neapolitan-style pies.
- Dock the dough, bake hot (500–550°F) for 4–6 minutes, and cool fully on a wire rack before topping or storing.
- Finish topped par-baked crusts at full heat for 5–8 minutes until the cheese melts and the crust re-crisps.
- Par-baked crusts freeze beautifully for up to 3 months — the ultimate homemade pizza-night shortcut.
- Meat toppings must still reach 165°F (74°C) internal; the shorter finish bake means checking, not assuming.
What Is Par Baked Pizza Crust?
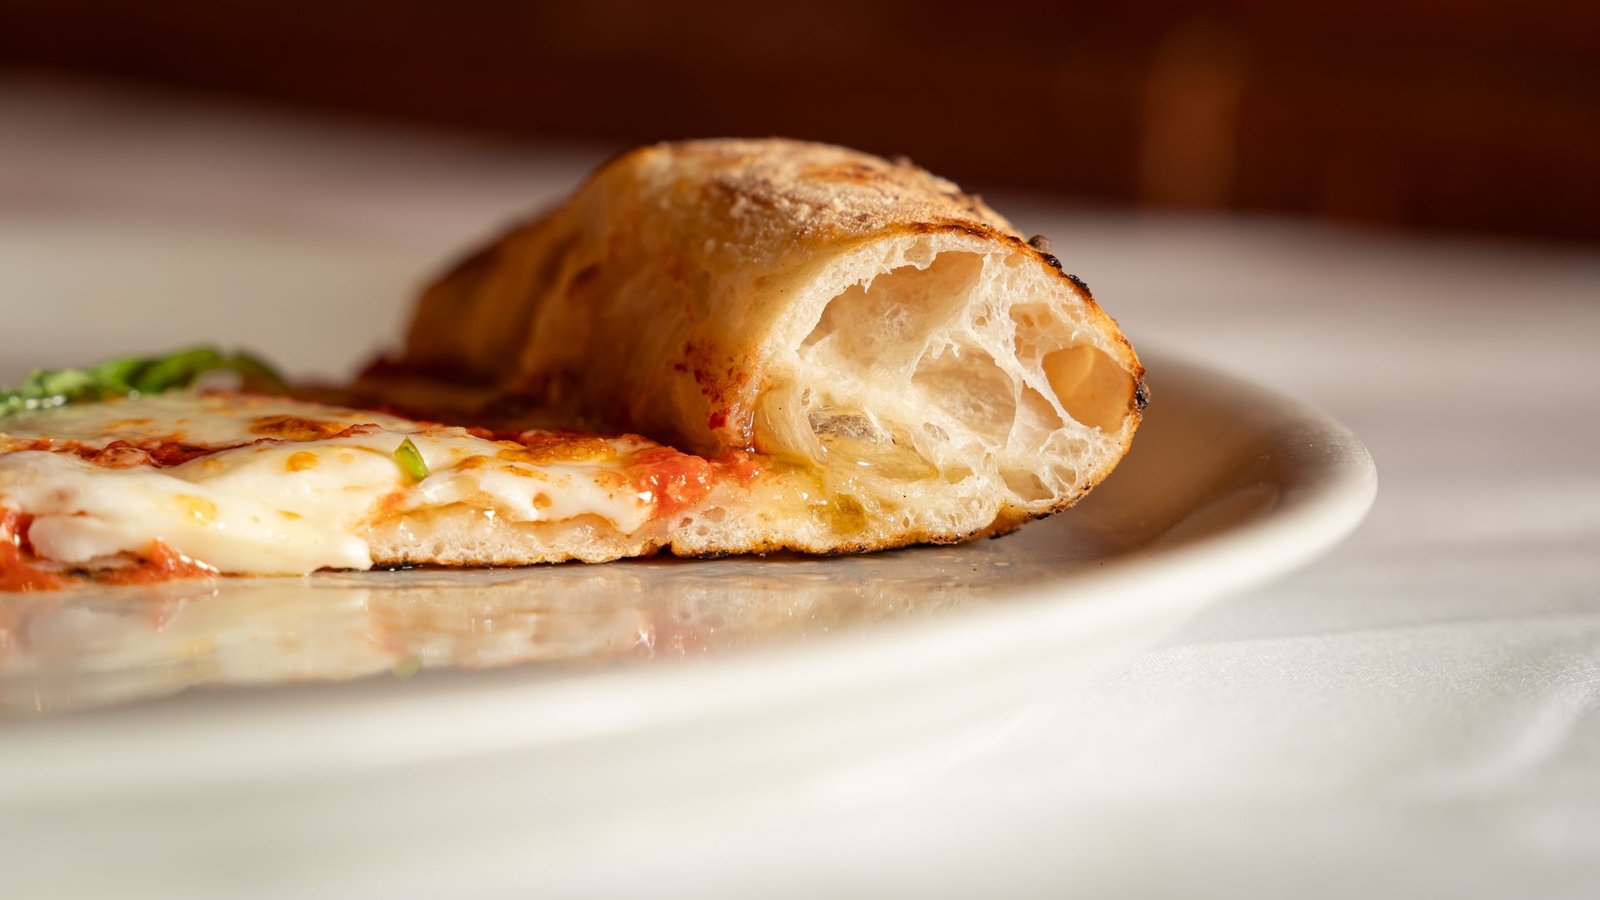
Par-baking (partial baking) means putting shaped, sauce-free, topping-free dough through most of a bake — long enough to set the structure, gelatinize the starches, and develop light color — then stopping before it’s done. The typical par-bake runs 4–6 minutes at 500–550°F (260–290°C), taking the crust to roughly 70–80% of a full bake: firm to the touch, pale gold rather than deep brown, with the interior crumb set but not dried out.
What you’ve made is essentially a blank canvas with structure. The gluten network is fixed, the crust won’t shrink or bubble wildly when topped, and — critically — the base is already mostly cooked, so it can’t turn gummy under a heavy load of sauce and cheese. That last point is the real superpower: it’s why par-baking is the answer to soggy pizza in loaded styles, and why it rescues pizzas topped by enthusiastic guests who don’t understand restraint.
This is different from pre-made store dough and different from fully baking and reheating. A fully baked-then-reheated crust dries out and toughens; a par-baked crust finishes its baking with the toppings, so the cheese melts into a crust that’s still completing its bake — the two finish together, which is why the result tastes integrated rather than assembled.
The technique has professional roots: pizzerias par-bake shells for lunch rushes, and bread bakers have par-baked rolls for decades (that’s what “bake-off” bread in supermarkets is). Home pizza makers are just borrowing a commercial workflow — and it scales down to a home oven perfectly, no special equipment required beyond what you’d use for a normal pizza night.
When Par-Baking Helps (and When It Hurts)
Par-baking shines when:
You’re feeding a crowd. This is the number-one use case. Par-bake all your crusts in the calm hour before guests arrive, then run a topping-and-finish assembly line during the party. Each pizza needs only 5–8 minutes in the oven instead of 12–15, so throughput roughly doubles — the difference between relaxed hosting and oven panic. Our pizza party guide pairs perfectly with this method.
The pizza is thick or heavily loaded. Deep, bready crusts and topping mountains are where raw dough struggles: by the time the center cooks through, the top burns. Par-baking separates the two jobs — the crust’s structure gets built in bake one, the toppings get finished in bake two. Chicago deep-dish makers and loaded Detroit-style bakers use this principle routinely.
You’re meal-prepping. A stack of par-baked crusts in the freezer means a homemade pizza is 10 minutes away on any weeknight — faster than delivery, better than frozen. Top from the fridge or freezer and bake; dinner solves itself.
Your oven runs cool or uneven. Home ovens that top out at 475°F struggle to get raw dough crisp before toppings overcook. Par-baking lets you build the crust’s crispness in an untopped bake where there’s nothing to burn, then finish gently.
Skip par-baking when:
You’re making Neapolitan-style pizza. The entire point of Neapolitan is the single blazing-hot 60–90 second bake — puff, char, and chew in one violent transformation. Par-baking would destroy exactly what makes it special. If that’s your style, our Neapolitan guide is the path; par-baking is not.
You want maximum oven spring and an open crumb. A single continuous bake always gives slightly better rise than a split bake. For your absolute best, most artisanal pie — the one you’re photographing — bake it straight through.
It’s just one or two pizzas on a quiet night. Par-baking adds steps. For a normal weeknight pie, the standard method is simpler and marginally better. Save the technique for when its advantages — speed, volume, insurance against sogginess — actually apply.
How to Par-Bake Pizza Crust: The Method
Step 1 — Make and shape your dough as usual
Use your normal dough — this technique works with any recipe — and let the balled dough come fully to room temperature. Stretch or roll to your target size. For par-baking, roll slightly thinner than you would for a direct bake, since the crust won’t get the same oven spring in the second bake and you want to avoid a bready result.
Step 2 — Dock thoroughly
This step is non-negotiable. Prick the entire surface — center and rim — densely with a fork or a dough docker, pressing all the way through. Docking vents the steam that would otherwise balloon the crust into a giant pita during the untopped bake. Undocked par-baked crusts puff unevenly and bake into domes; docked ones stay flat and bake evenly. Be thorough: a missed patch becomes a bubble.
Step 3 — Optional: a whisper of oil
Brush the surface very lightly with olive oil — just enough to kiss it, not pool. This does two things: it promotes even, attractive browning during the par-bake, and it creates a slight moisture barrier that helps the finished crust resist sogginess under sauce. Skip this if you’re watching fat content; it’s a refinement, not a requirement.
Step 4 — Bake hot: 4–6 minutes at 500–550°F
Launch onto your preheated steel or stone — or a preheated sheet pan if that’s your setup — and bake until the crust is set, firm to the touch, and pale gold with the first hints of deeper color at the edges. It should look almost done but clearly not finished: no deep browning, no crisp snap yet. Start checking at 4 minutes; most home ovens land at 5. Pull it at 70–80% — if you’re unsure, err on the under side. You can always bake more in the finish; you can’t un-bake.
Step 5 — Cool completely on a wire rack
Transfer immediately to a wire rack — not a plate, not a cutting board. Trapped steam underneath will sog the bottom you just worked to crisp. Cool to room temperature, 20–30 minutes. The crust will firm up as it cools; that’s normal and desirable. Only top, stack, or bag crusts that are fully cool — warmth plus enclosure equals condensation, and condensation equals a soft crust.
The Party Assembly Line: Par-Baking for a Crowd
Here’s the system that turns par-baking into a hosting superpower. For a party of 10–12 (plan on 3–4 slices per person, roughly 4–5 large pizzas):
Two hours before guests: par-bake all crusts. They stack neatly once cool — separate with parchment if stacking more than three high — and hold at room temperature for hours without any quality loss.
Set up a topping bar: sauce, cheeses, and toppings in bowls with spoons, like a taco bar. Guests build their own — it’s interactive, it distributes the work, and people love it. Keep raw meats off the bar (food safety: raw meat handled by many hands at room temperature is a risk); if you want meat options, pre-cook sausage, bacon, or chicken and offer them cooked.
During the party: top a crust, launch, bake 5–8 minutes at your oven’s max while the next pizza gets topped. With the crust pre-baked, the finish bake is just about melting cheese and heating toppings — fast and forgiving. One person can run the oven while guests mingle, and pizzas emerge at a steady, impressive clip.
The math that matters: a direct-bake pizza night serves one pizza every 12–15 minutes of oven time. A par-baked night serves one every 6–8. Over a two-hour party, that’s the difference between 8 pizzas and 15 — or equivalently, the difference between you being stuck at the oven all night and you actually attending your own party.
Topping and Finishing a Par-Baked Crust
The finish bake has its own rules. Because the crust is already 75% baked, everything about the topping stage shifts:
Go lighter on sauce than you think. The crust won’t absorb moisture the way raw dough does — the par-bake sealed the surface. What would be a normal sauce amount on raw dough can slide around or pool on a par-baked base. Use about three-quarters of your usual sauce and spread it evenly to the edge.
Cheese strategy changes too. Since the bake is short, cheese needs to melt fast — use low-moisture mozzarella shredded fresh (it melts faster and more evenly than pre-shredded), and don’t bury the pizza. Heavy cheese blankets insulate the crust and need longer than the finish bake allows.
Finish hot and watchful. Bake at your oven’s maximum — 500–550°F — for 5–8 minutes, until the cheese is fully melted with browned spots and the crust edges have taken on final color. The crust re-crisps in this bake; pull it when it looks done, not when a timer says so.
Food safety note: the shorter finish bake means less margin for bringing cold toppings up to temperature. Any meat on the pizza must reach 165°F (74°C) internally — use pre-cooked meats (the safest choice for par-baked pizzas) or verify with an instant-read thermometer. Cold, wet vegetables like fresh mushrooms can also chill the pizza’s center; give them a head start by sautéing, or slice thin.
Storing Par-Baked Crusts: Refrigerator and Freezer
Room temperature: cooled par-baked crusts hold 4–6 hours at room temp, loosely covered — perfect for same-day party prep. Beyond that, refrigerate or freeze.
Refrigerator (2–3 days): stack cooled crusts with parchment between them, wrap the stack tightly in plastic or seal in a large bag, and refrigerate. The crusts will soften slightly in the fridge’s humidity; the finish bake re-crisps them fully, so don’t worry.
Freezer (up to 3 months): this is where par-baking becomes a lifestyle. Stack cooled crusts with parchment separators, wrap the stack tightly in plastic wrap, then seal in a freezer bag with the air pressed out. Label with the date. Freeze flat — warped crusts bake unevenly.
Using frozen crusts: no need to thaw. Top straight from frozen and add 2–3 minutes to the finish bake. The crust goes from freezer to oven to table in under 15 minutes, which makes this the fastest genuine homemade pizza method in existence — faster than delivery on a busy night, and incomparably better than a boxed frozen pizza. Our dough freezing guide covers raw-dough freezing too, if you want both options in your arsenal.
Common Par-Baking Mistakes
Baking too far. The number-one error. A par-bake that goes to full color and full crispness leaves nothing for the finish bake — the second bake then dries the crust into a cracker. Remember: pale gold, set but not crisp, 70–80%. When in doubt, pull it early.
Skipping the docking. Undocked crusts balloon into pitas. There’s no fixing it after the fact — a giant air pocket under your toppings is a structural failure. Dock densely, edge to edge.
Topping while warm. Warm crust plus sauce equals instant sogginess, and warm crusts stacked together steam each other soft. Cool fully on a wire rack. Every time. No exceptions.
Storing without parchment separators. Stacked par-baked crusts fuse together as their residual moisture migrates. Parchment between every crust — it’s cheap insurance against tearing them apart later.
Using the same bake time as raw dough for the finish. The finish bake is shorter — 5–8 minutes, not 12–15. Leaving a topped par-baked pizza in for a full raw-dough bake burns the cheese and dries the crust. Set a shorter timer and watch the cheese, not the clock.
Par-baking too thin. Rolled paper-thin and par-baked, then baked again, a crust can cross from crisp into brittle. Keep par-baked crusts at a medium thickness — the double bake needs something to work with. Cracker-thin styles should be baked straight through in a single bake.
Par-Baked vs. Other Shortcuts
How does par-baking compare to the other ways people shortcut pizza night?
Vs. store-bought dough: par-baked homemade crusts win on every axis except zero-effort convenience. They taste like your dough (because they are), cost less, and freeze just as well. Store dough is fine in a pinch, but it’s a compromise you can taste.
Vs. no-yeast dough: no-yeast pizza dough is faster (no rise at all) but gives you a biscuit-like crumb with none of yeast’s flavor. Par-baking takes planning but delivers real fermented-dough flavor and texture. Different tools: no-yeast for “pizza in 30 minutes flat,” par-baked for “real pizza, fast, on my schedule.”
Vs. fully baked and reheated: reheated pizza is never as good as finished-to-order — the crust toughens and the cheese goes rubbery. Par-baked crusts finish with their toppings, so the final bake is a real bake, not a reheat. There’s no comparison in quality.
Vs. just ordering delivery: on pure speed, delivery sometimes wins. On cost, quality, and the satisfaction of pulling your own pie from the oven, par-baked homemade wins walking away — especially with a freezer stash.
Frequently Asked Questions
How long do you par-bake pizza dough?
4–6 minutes at 500–550°F (260–290°C), until the crust is set, firm, and pale gold — about 70–80% of a full bake. Thicker crusts lean toward 6 minutes; thinner toward 4. Start checking at 4 minutes. The visual cue matters more than the timer: set and lightly colored, not browned and crisp.
Can you par-bake pizza dough the day before a party?
Yes — par-bake up to 24 hours ahead and refrigerate the cooled crusts (parchment between layers, wrapped airtight), or par-bake weeks ahead and freeze. For a party, the smoothest workflow is par-baking the morning of: crusts hold perfectly at room temperature for the 4–6 hours until guests arrive, no refrigeration needed.
Do you put sauce on before par-baking?
No — par-bake the crust plain, with at most a whisper of olive oil. Sauce goes on after, at topping time. Baking sauce into the par-bake wastes the moisture-barrier advantage, risks burning the sauce’s sugars during the double bake, and makes the crust harder to store (sauced crusts don’t stack or freeze as cleanly).
Can you par-bake store-bought pizza dough?
Absolutely, and it’s a genuine upgrade over baking store dough straight through with toppings. Stretch it, dock it, par-bake 4–5 minutes, cool, then top and finish. The structure-setting helps store doughs especially, since they tend toward gumminess under heavy toppings. Same rules apply: cool fully, don’t over-bake the par-bake.
Why did my par-baked crust puff up like a balloon?
Insufficient docking. The steam generated in the hot oven had nowhere to go and inflated the crust. Dock densely with a fork — press all the way through, covering every square inch including the rim — and make sure your oven is fully preheated so the crust sets quickly. A docker tool (a spiked roller) makes this fast if you par-bake often.
Is par-baked pizza crust the same as a frozen store pizza base?
Similar idea, wildly different execution. Commercial frozen bases are formulated for months of freezer life and uniform factory baking — they’re engineered for shelf stability, not flavor. Your homemade par-baked crust is your own fermented dough, baked in your oven, frozen for weeks not months. The technique rhymes; the results don’t compare.
Conclusion: The Make-Ahead Move That Changes Pizza Night
A par baked pizza crust is one of those techniques that sounds like a compromise and tastes like an upgrade: all the flavor of your own fermented dough, with the speed and flexibility of a shortcut. Bake the structure ahead, cool it properly, and the finish — topped to order, baked hot and fast — delivers a crisp, fully-realized pizza in half the oven time. For parties, for meal prep, for loaded pies that need structural insurance, it’s the smartest move in the home pizza playbook.
Try it once before you need it: par-bake two crusts this weekend, freeze them, and pull one out on a busy weeknight. When a genuinely great homemade pizza hits the table fifteen minutes after you decided you wanted it, you’ll understand why pizzerias figured this out long ago — and why your freezer should always hold a stack. The best pizza shortcut isn’t a product you buy; it’s a technique you learn once and use forever.