

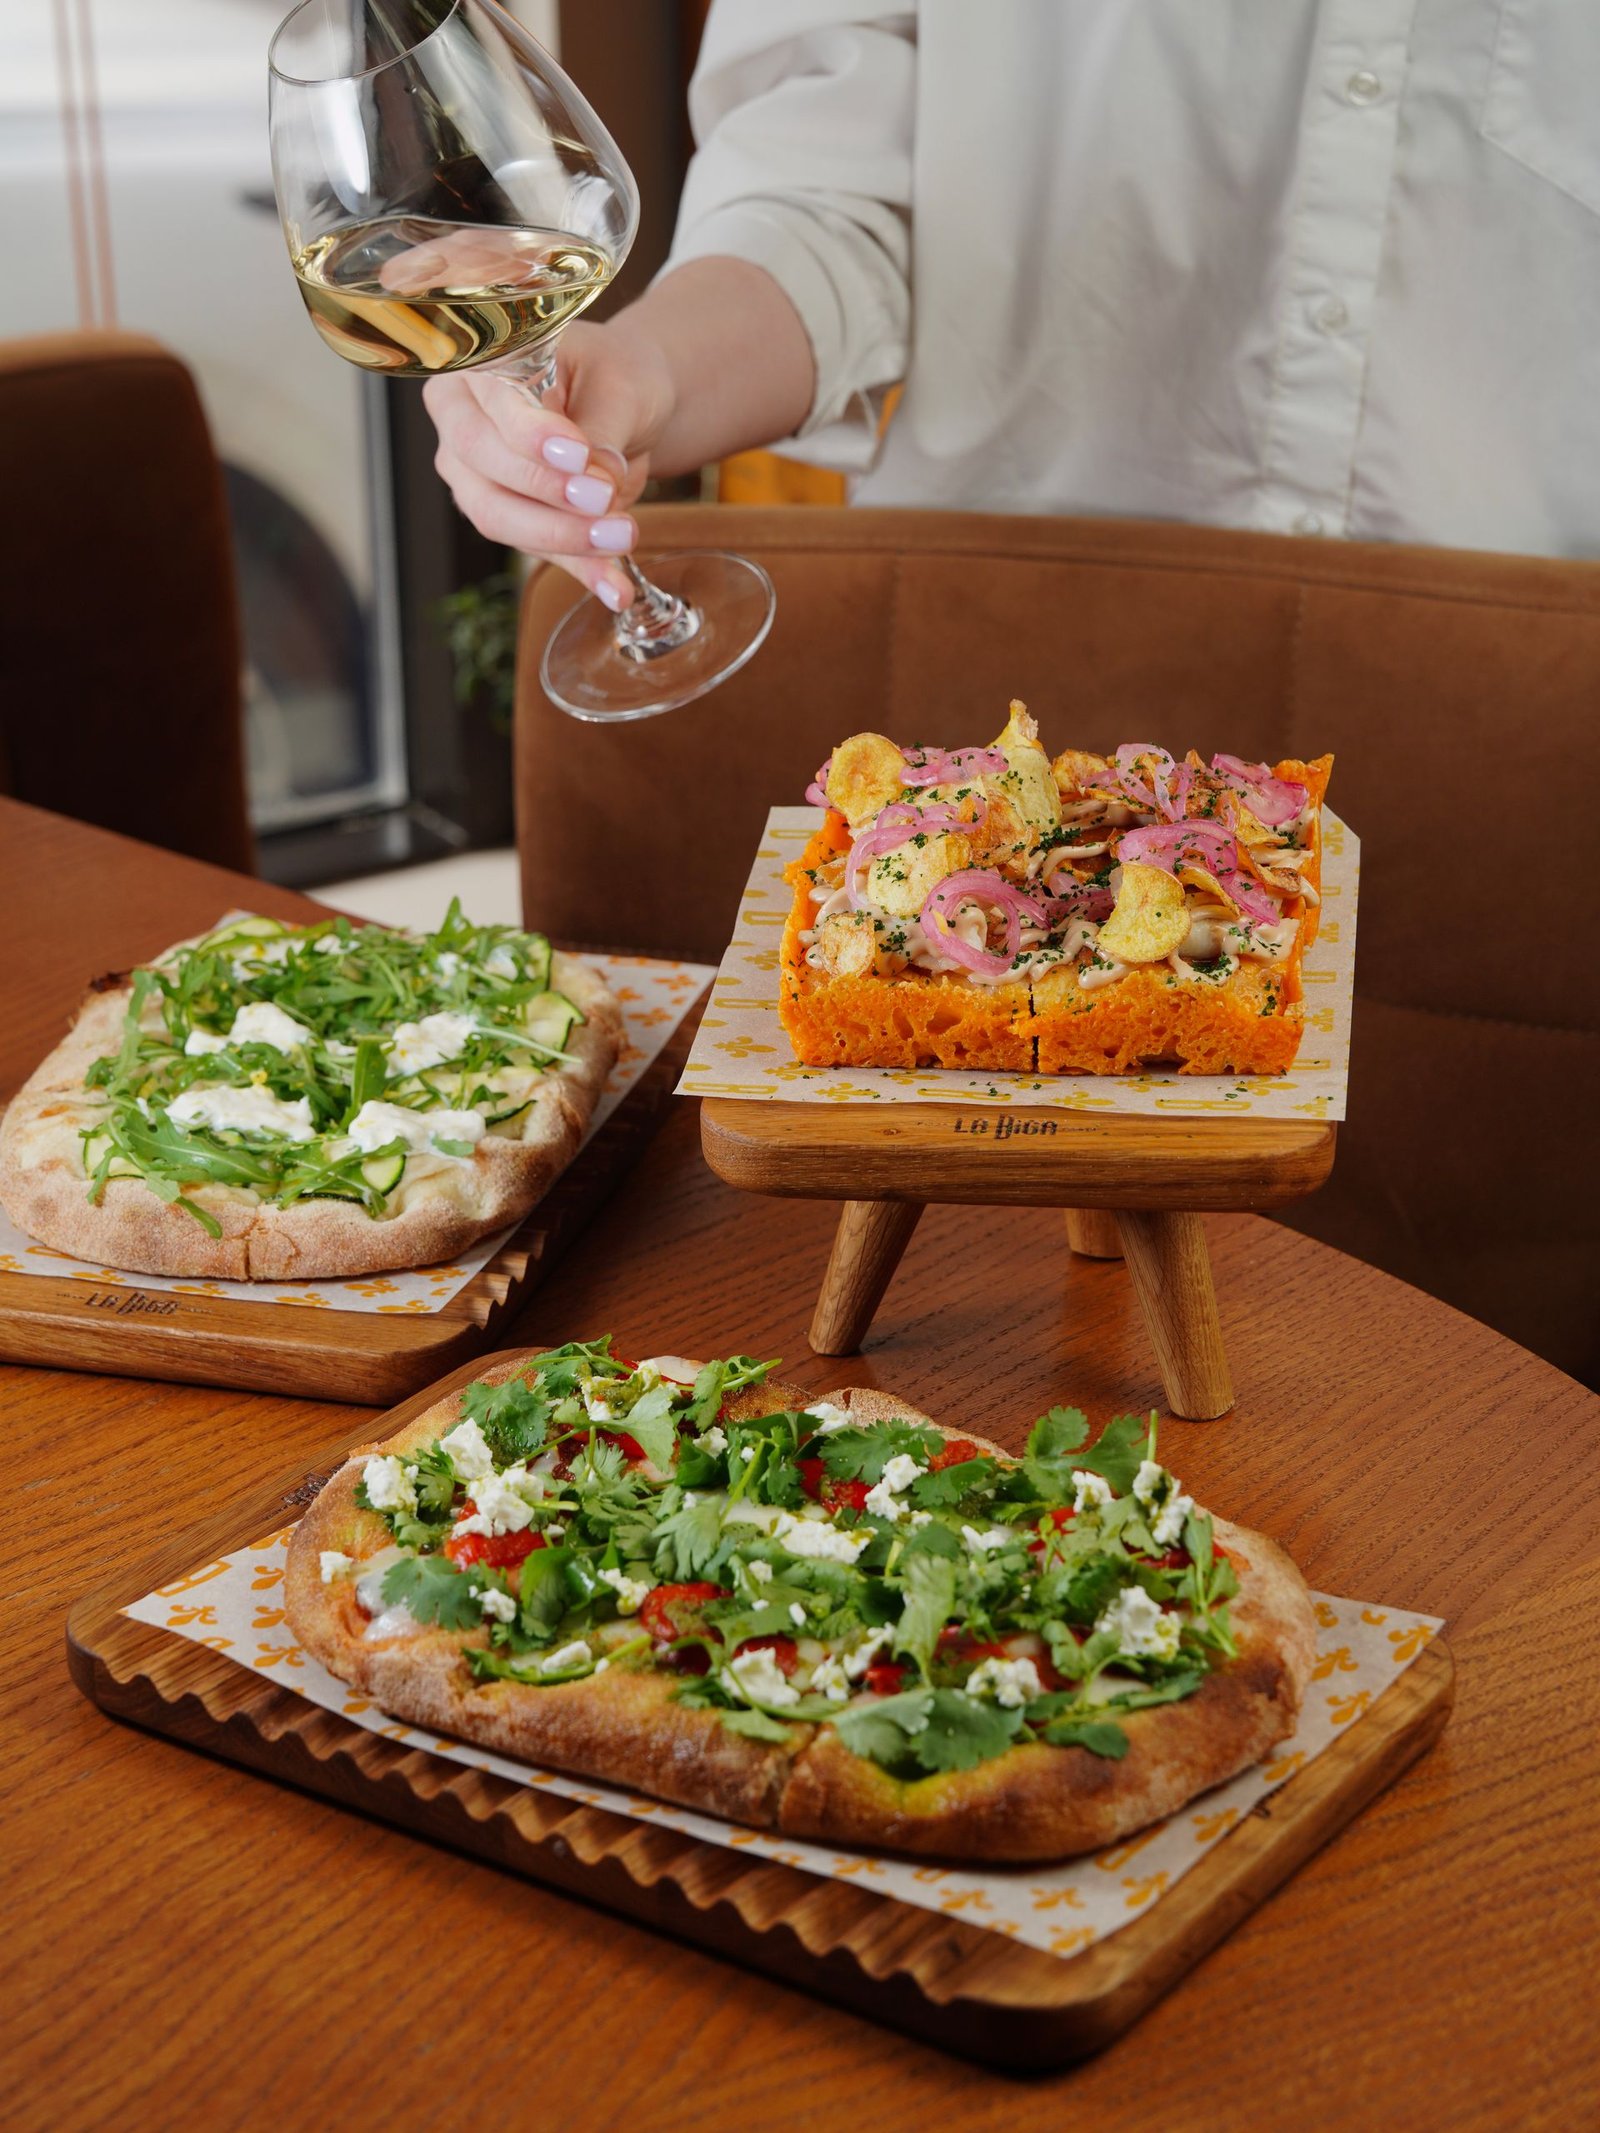
Pinsa romana looks like pizza’s elegant Roman cousin — and in a way, it is. Where a Neapolitan pie is round, soft, and soupy in the center, pinsa romana is oval, startlingly light, and shatteringly crisp outside with an open, airy crumb inside. It’s made from a distinctive blend of wheat, rice, and soy flours, fermented long and slow, stretched into its signature oval, and baked in two stages. If you’ve never had it, the first bite is a surprise: it eats lighter than it looks, with a crunch that gives way to almost nothing — in the best way.
Pinsa has been one of the most talked-about pizza styles of the last decade, spreading from Rome to pizzerias and frozen-food aisles around the world. But it’s also widely misunderstood — confused with flatbread, with focaccia, or with “healthy pizza” marketing. This guide sets the record straight: what pinsa romana actually is, how it differs from pizza, the story of its modern revival, the flour blend and fermentation that define it, and a complete home method for making genuinely good pinsa in a regular oven. You’ll also find topping ideas, serving tips, and answers to the questions everyone asks. If you can make pizza dough from scratch, you can make pinsa — the techniques overlap more than the results suggest.
🍕 Key Takeaways
- Pinsa romana is Rome’s oval flatbread-pizza hybrid: crisp outside, open and airy inside, made from a wheat, rice, and soy flour blend.
- It differs from pizza in shape (oval), flour (multi-grain blend), hydration (very high), and bake (par-baked, then topped and finished).
- The modern pinsa was revived and codified in Rome in 2001 after research into ancient Roman flatbreads.
- Long, cold fermentation — 24 to 72 hours — and ~80% hydration are what create pinsa’s signature light, digestible-feeling crumb.
- At home: mix a high-hydration dough, cold-ferment, stretch gently into an oval, par-bake, then top lightly and finish hot.
- Top pinsa after par-baking with fresh, light toppings — it rewards restraint, not the loaded-pie treatment.
What Is Pinsa Romana?
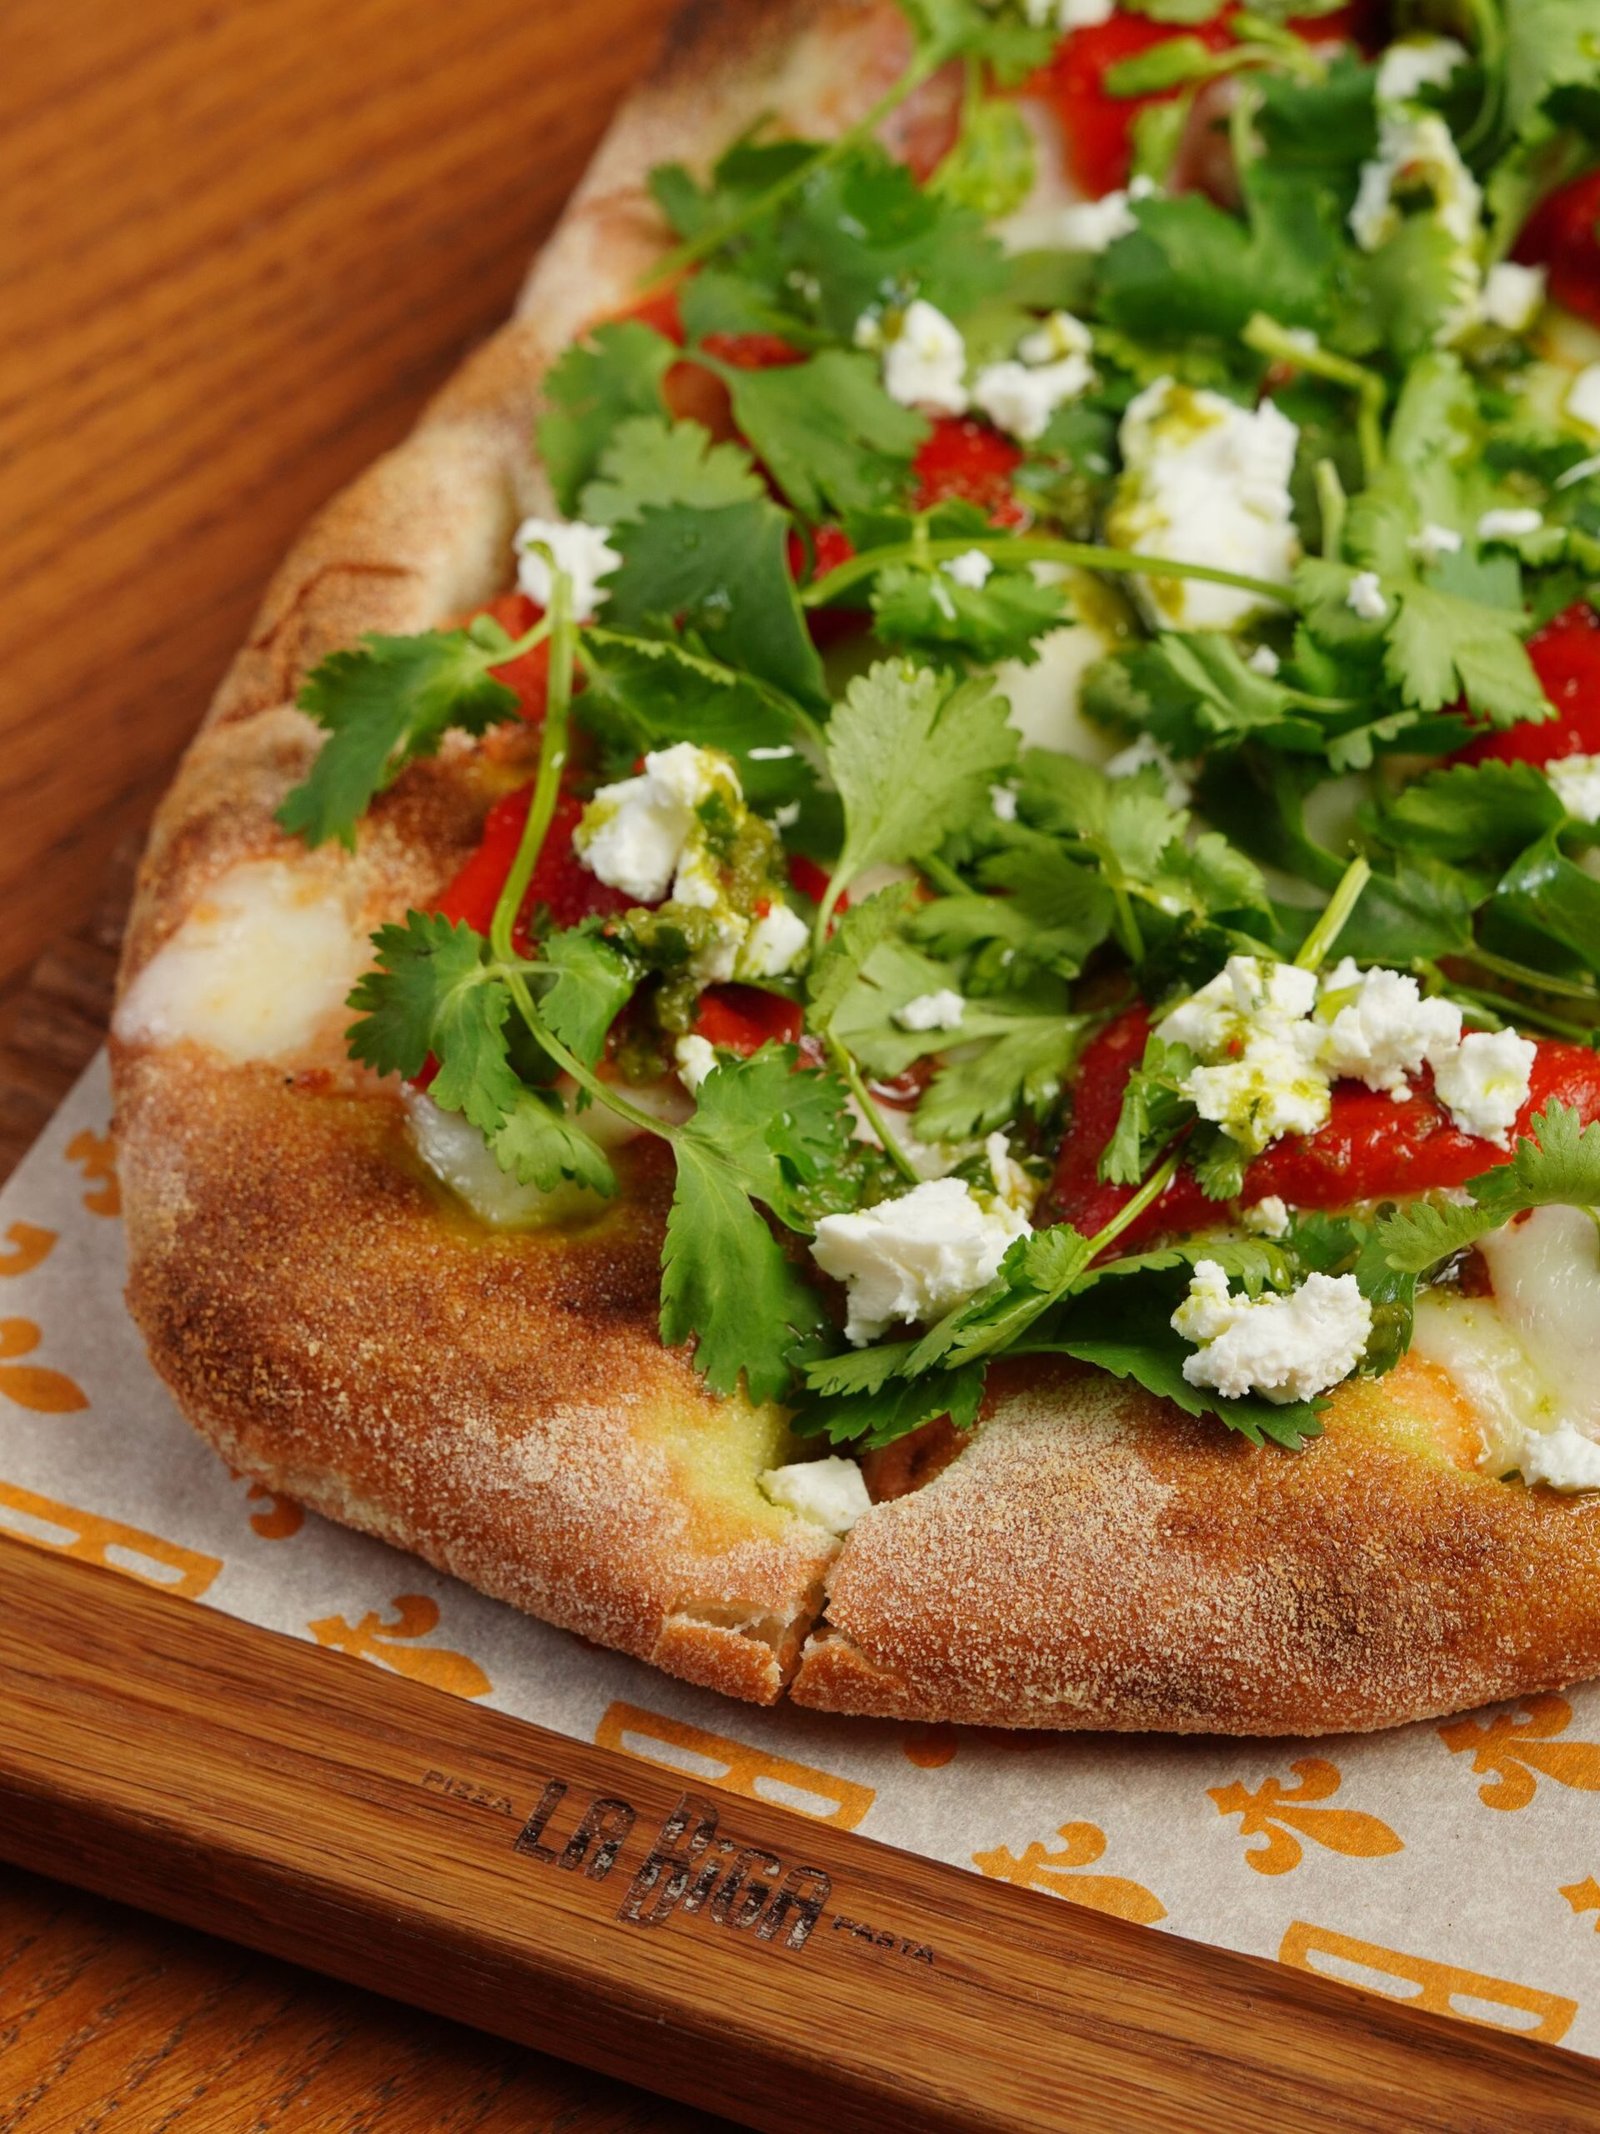
Pinsa romana is a leavened flatbread from Rome, baked in an oval shape from a dough that blends wheat flour with rice flour and soy flour (sometimes with a little dried sourdough in commercial mixes). The dough is very wet — around 80% hydration, far wetter than standard pizza dough — and fermented cold for one to three days. That long, slow fermentation plus the high water content produces the texture that defines pinsa: a crust that is crisp and almost crackery on the outside, with an interior crumb full of irregular air pockets, light as a sponge.
The name comes from the Latin pinsere, meaning to stretch or press — a reference to the hand-stretching that gives pinsa its oval form. The oval isn’t a gimmick; it’s how the dough is traditionally pressed out by hand, longer than it is wide, and it distinguishes pinsa at a glance from every round pizza on the menu. In Rome, pinsa is often sold par-baked — the ovals baked once without toppings, then topped and finished to order — which is why you’ll find pinsa bases in Italian bakeries and, increasingly, in frozen form abroad.
One clarification worth making early: pinsa is not “healthy pizza,” no matter what some marketing says. It’s a different product with a different texture, made from refined flours like any good flatbread. What it genuinely offers is lightness of eating — the airy crumb and crisp shell mean a whole pinsa feels less heavy than an equivalent amount of denser pizza. Judge it on deliciousness, not diet claims.
Pinsa vs. Pizza: How They Differ
Shape and format
The most obvious difference: pinsa is oval, pizza is round. The oval comes from the pressing technique — the dough is stretched lengthwise — and pinsa is typically sized as an individual portion, roughly 12 inches long. It’s also frequently sold as a par-baked base, something almost no pizzeria does with pizza dough. That two-stage bake (more on it below) is fundamental to the style.
The flour blend
Standard pizza dough is 100% wheat flour. Pinsa dough, in its codified modern form, blends wheat flour with rice flour and soy flour. Rice flour contributes crispness — it fries up beautifully in the oven heat — while soy flour adds protein and helps the dough hold its remarkable water content. The exact ratios are part of the original trademarked formula, but the home-baker’s version (roughly 80% wheat, 15% rice, 5% soy, by weight of flour) captures the character. Our pizza flour guide covers what each flour brings to a dough if you want to go deeper.
Hydration and fermentation
Pizza dough typically runs 60–65% hydration; pinsa runs around 80%. That wet dough, combined with a long cold fermentation of 24–72 hours, is what builds the open, irregular crumb. The long ferment also develops flavor — mild, wheaty, faintly sweet — and it’s the same principle behind our cold-ferment pizza dough guide, just pushed further. If you’ve worked with high-hydration dough before, pinsa will feel familiar; if not, expect a dough that’s closer to batter than to the firm ball you’re used to, and trust the process.
Texture and eating experience
A Neapolitan pizza is soft and foldable with a puffy rim; a New York slice is chewy with structure. Pinsa is crisp — the exterior shatters lightly — with an interior that’s mostly air. It doesn’t fold; it snaps. Toppings sit on top rather than melding in, which is why pinsa suits fresh, light toppings (more on those below) rather than heavy, wet ones. Think of it as the crunchiest vehicle in the flatbread family.
The Story: Ancient Roots, Modern Revival
Pinsa’s marketing often claims ancient Roman origins, and there’s a grain of truth: the Romans did bake flatbreads pressed and stretched by hand, and pinsere is genuinely Latin. But the pinsa you can order today is a modern creation, and its story is well documented. In 2001, after years of research into historical grains and baking methods, Corrado Di Marco — a Roman pizza maker — developed and trademarked the “Pinsa Romana” formula: the specific flour blend, the high hydration, the long fermentation, and the oval pressing technique.
Di Marco’s insight was that ancient Romans used a variety of grains and legumes in their flatbreads, not just wheat, and that a multi-flour dough fermented slowly would bake up lighter and crisper than standard pizza dough. He built a business around the flour blend itself, supplying pinsa flour mix to bakeries and pizzerias, and the style spread through Rome’s bakeries first — sold as par-baked ovals to finish at home — then to pizzerias, then abroad. Today you’ll find pinsa on menus across Europe and North America and pinsa bases in the frozen aisle, a remarkable run for a style that’s barely two decades old in its current form.
The lesson for home bakers: pinsa is a designed product, not a folk tradition with a single authentic recipe. That frees you to adapt it. The codified elements — multi-flour blend, high hydration, long cold ferment, oval shape, two-stage bake — are what make it pinsa; everything else is technique you can tune to your kitchen.
The Flour Blend That Defines Pinsa
Let’s get practical about the flours, because this is where pinsa succeeds or fails. You need three:
Wheat flour (about 80% of the flour weight). Bread flour works; Italian “0” flour is traditional if you can find it. This provides the gluten structure that holds the wet dough together.
Rice flour (about 15%). Use plain white rice flour, not glutinous/sweet rice flour. Rice flour has no gluten, so it dilutes the wheat’s structure — that’s the point. It fries crisp in the oven and contributes to the shattering crust. It also absorbs water differently, which is part of why the dough feels so unusual.
Soy flour (about 5%). Defatted soy flour is what the original formula uses; it adds protein and emulsifying power that helps the high-hydration dough hold together and brown beautifully. A little goes a long way — more than about 5–7% and the flavor turns beany.
A workable home formula for two pinse: 400g bread flour, 75g rice flour, 25g soy flour (500g flour total), 400g water (80% hydration), 10g salt, 3g instant yeast, 15g olive oil. Mix, rest, ferment cold 24–72 hours. That’s it — the ingredient list is short; the technique is everything. Weigh everything on a scale; at 80% hydration, small measuring errors swing the dough dramatically. For more on how hydration shapes dough behavior, our dough hydration guide is useful background.
How to Make Pinsa Romana at Home
This method assumes a standard home oven and a baking steel or stone. The two-stage bake is non-negotiable — it’s what makes pinsa pinsa.
Mixing a high-hydration dough
Combine the flours, then add the water and mix until no dry flour remains — the dough will look shaggy and rough. Rest 20–30 minutes (an autolyse, which helps the flour hydrate), then add salt, yeast, and olive oil and mix until combined. You don’t need to knead intensely; a few minutes of mixing or a series of folds over the first hour develops enough strength. The dough will be sticky and slack — wetter than any pizza dough you’ve handled. Resist the urge to add flour; flour the surface and your hands instead, and use a bench scraper. This is the hardest part for beginners and the most important to push through.
The long cold fermentation
Transfer the dough to a lightly oiled container, cover, and refrigerate 24 to 72 hours. The dough will roughly double, slowly, developing flavor and — crucially — the extensibility that lets you stretch it thin without tearing. Longer is generally better within that window; 48 hours is the sweet spot for most home bakers. Two hours before baking, divide into 250g portions, shape gently into loose ovals, and let them warm up at room temperature, covered. Cold dough going into a hot oven seizes and won’t open up properly.
Stretching the oval
Flour your work surface generously — rice flour or semolina works well for dusting. Place a dough portion on the surface and press gently from the center outward with your fingertips, lengthening it into an oval about 12 inches long and 6–7 inches wide. Work air bubbles toward the edges rather than popping them; those bubbles become the crumb. Keep the thickness even and fairly thin — about ¼ inch. Don’t use a rolling pin: it crushes the air structure you spent two days building. An oval with character beats a perfect rectangle; rustic is correct here.
Par-baking: the first bake
Preheat your oven as hot as it goes with a steel or stone inside for at least 45 minutes. Slide the bare oval onto the hot surface and bake 5–7 minutes, until set, lightly golden, and firm enough to handle — it should look like a finished flatbread base, pale but cooked through. This is the par-bake, and it’s the step that makes pinsa possible: it sets the structure and drives off surface moisture so toppings don’t sog. Cool the par-baked ovals on a wire rack. (You can par-bake several, cool them, and freeze them for later — they keep well frozen for a month, which makes pinsa a genuinely practical weeknight option.)
Topping and finishing
Now treat the par-baked oval like a pizza base: sauce thinly if using (or go sauceless), add toppings lightly, and return to the hot oven for 4–6 minutes until the toppings are cooked and the edges re-crisp. Because the base is already cooked, this second bake is short — you’re finishing, not baking raw dough. The result should be audibly crisp when you tap it, with a crumb full of holes when you tear it open. Cool 2 minutes on a rack, then cut lengthwise or into strips.
Topping Ideas for Pinsa
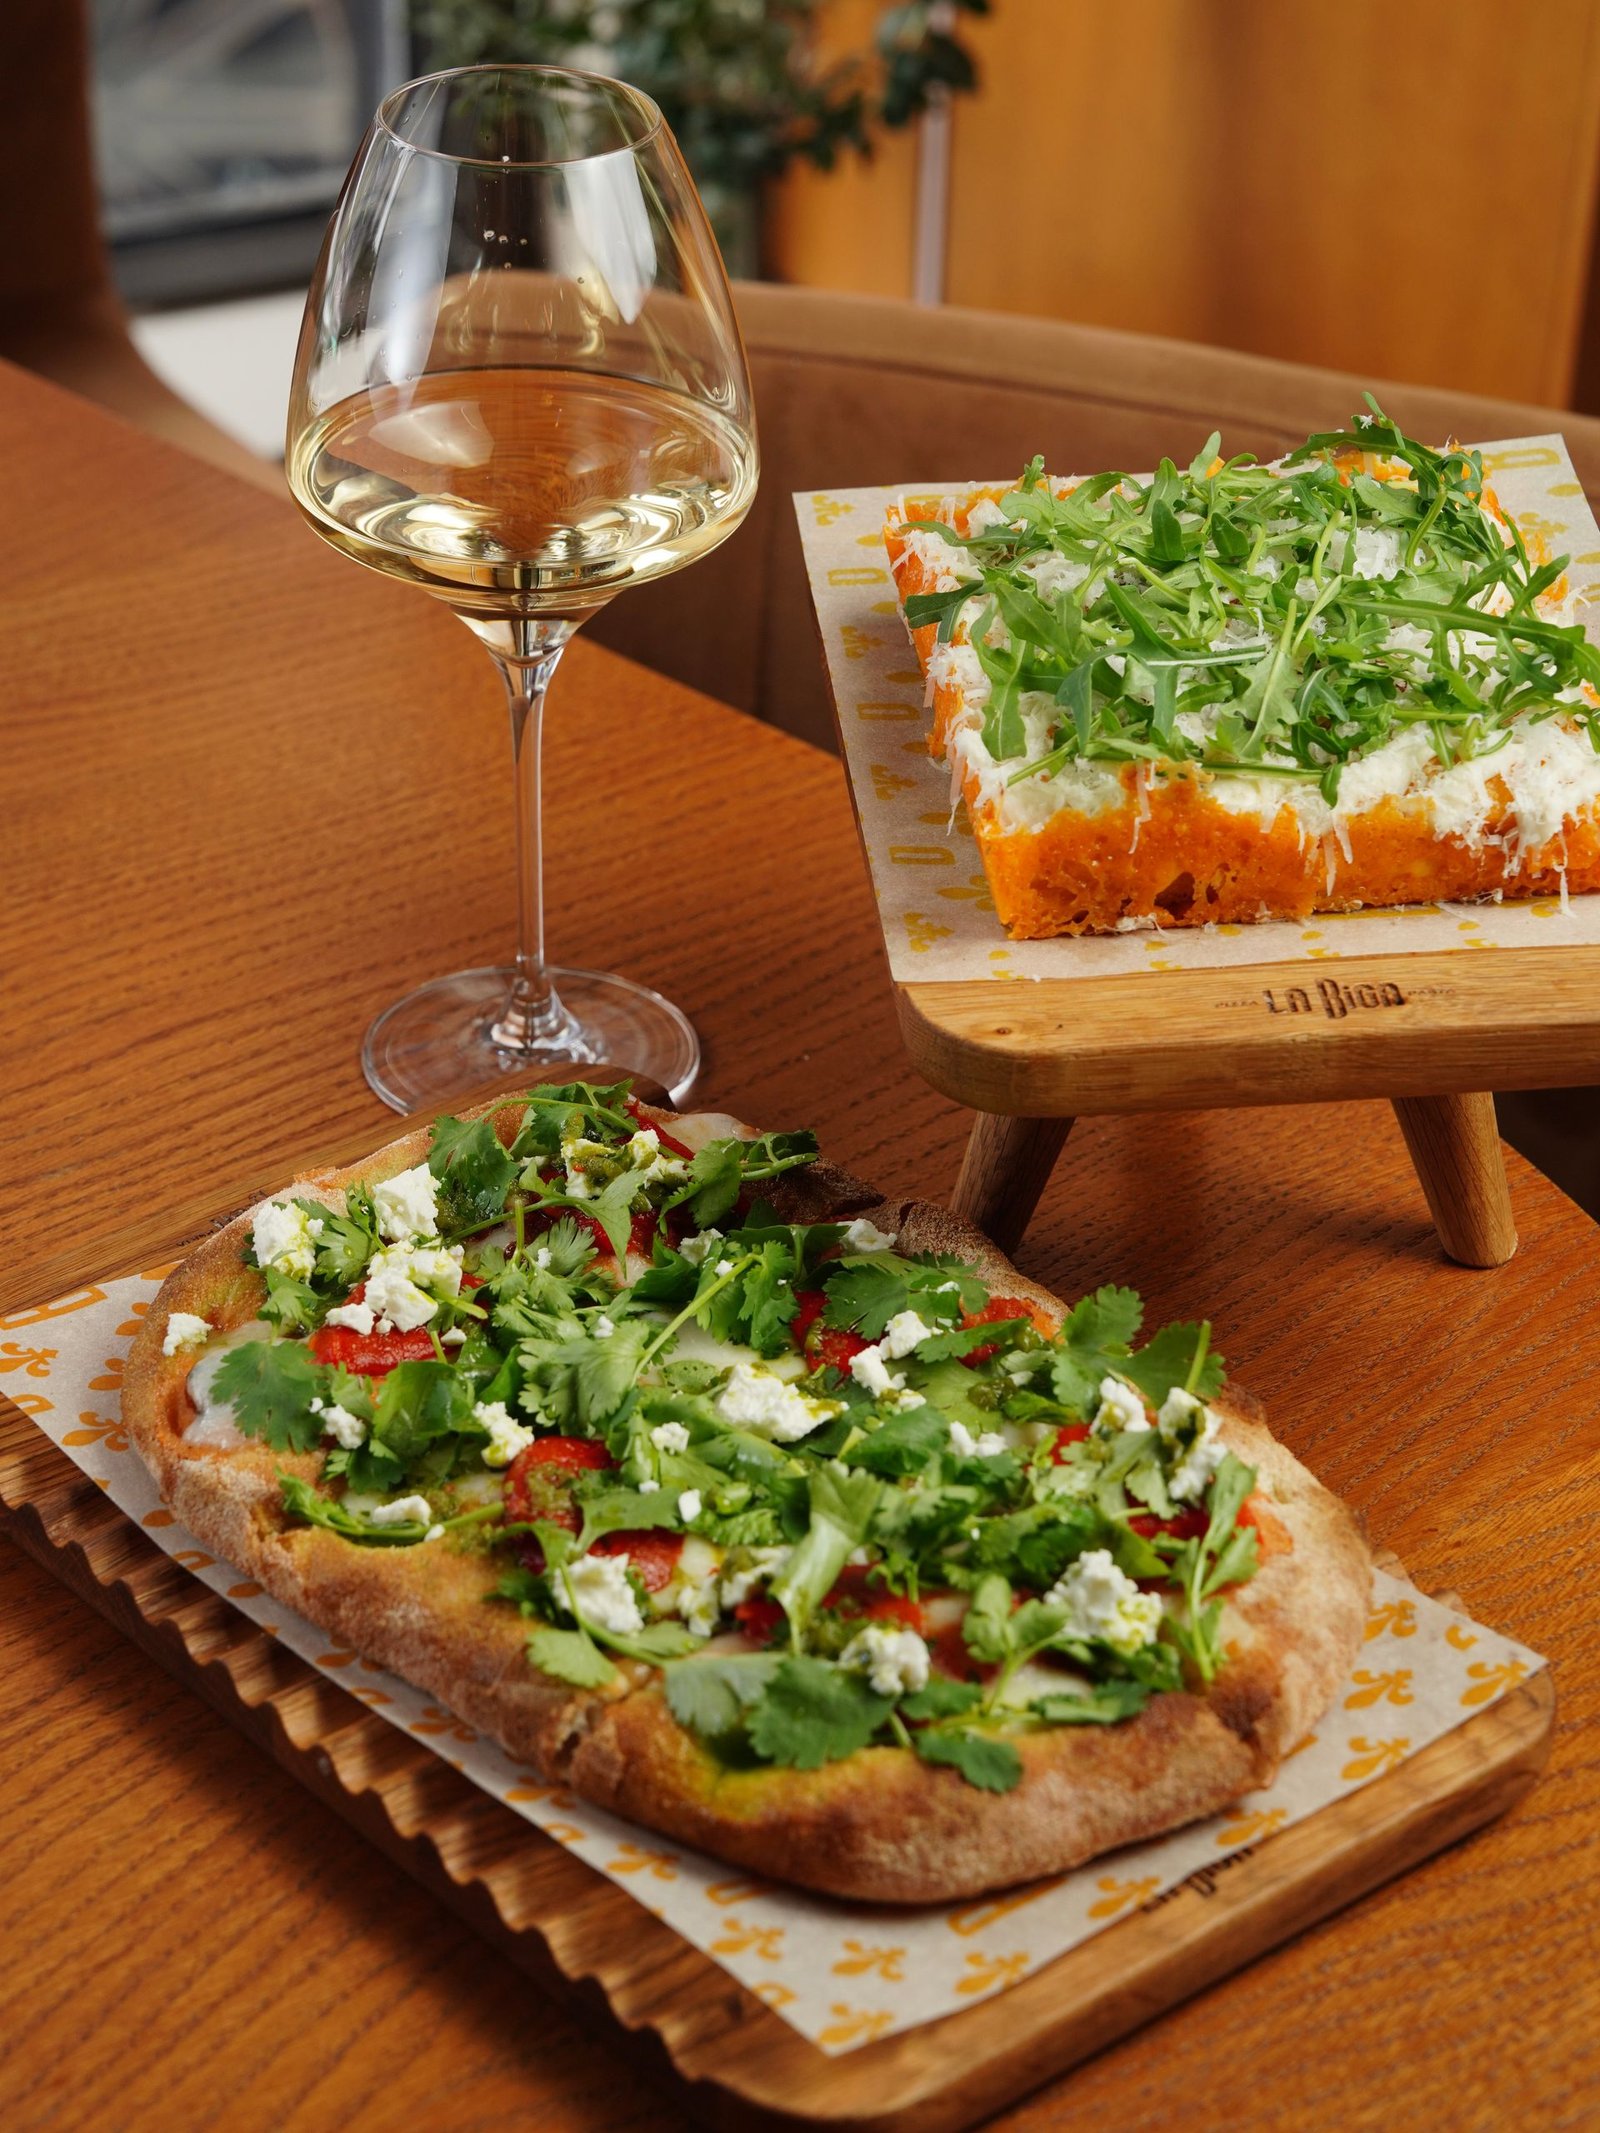
Pinsa’s crisp, airy base rewards toppings that are fresh and light rather than heavy and wet. A few combinations that work beautifully:
Classic margherita-style. Thin smear of crushed tomato, torn fresh mozzarella (used sparingly — the base can’t take a flood), basil added after baking, olive oil. Simple, and the best test of your pinsa technique.
Mortadella and pistachio. Bake the base plain or with a whisper of mozzarella, then top after baking with sliced mortadella, crushed pistachios, and a drizzle of olive oil. This is a Roman classic pairing and it’s magnificent on pinsa’s crunch.
Burrata and prosciutto. Light tomato or no sauce, a little mozzarella in the finish bake, then burrata, prosciutto, and arugula after the oven. The creamy burrata against the crisp base is the whole argument for pinsa in one bite.
Mushroom and taleggio. Sautéed mushrooms, thin slices of taleggio, thyme, finished hot so the cheese melts into the mushrooms. Earthy and rich without being heavy.
Marinara-plus. Crushed tomato, sliced garlic, oregano, olive oil — no cheese at all. The pinsa version of the great unadorned flatbread, and a good way to taste the base itself.
General rules: sauce thinly, go easy on wet mozzarella (pat it dry), add delicate greens and cured meats after baking, and finish with good olive oil. For more inspiration, our topping combinations guide has dozens of pairings that translate well — just use about two-thirds of what you’d put on a pizza.
Buying and Serving Pinsa
If you’d rather buy than bake, look for par-baked pinsa bases in Italian delis and better grocery stores, or in the frozen aisle — finish them from frozen with toppings in a hot oven and they’re genuinely good. In restaurants, pinsa appears both in pizzerias (as a menu alternative) and in pinsa-specific shops, particularly in cities with strong Italian food scenes.
Serve pinsa the Roman way: whole ovals on wooden boards, cut into strips tableside, eaten with hands. It doesn’t fold like a pizza slice — it snaps, so strips are the natural serving format. It’s excellent as an appetizer to share (one oval per two people as a starter), as a light main with a salad, or as part of a spread. Because the bases par-bake and freeze well, pinsa is also a strong candidate for pizza party hosting — par-bake a stack of ovals ahead, then let guests top their own and finish them in minutes.
Frequently Asked Questions
Is pinsa romana healthier than pizza?
Not meaningfully — it’s made from refined flours like any flatbread, and “healthier” marketing around pinsa should be taken with salt. What pinsa genuinely offers is a lighter eating experience: the high hydration and long fermentation produce an airy, crisp crumb that feels less dense than an equivalent amount of pizza. Enjoy it because it’s delicious and texturally unique, not because of diet claims.
Can I make pinsa with just regular flour?
You can make a pinsa-shaped flatbread with all wheat flour, but it won’t have pinsa’s signature texture. The rice flour is what creates the distinctive crispness, and the soy flour helps with structure and browning at high hydration. Both are easy to find — rice flour in most supermarkets’ gluten-free or Asian aisles, soy flour online or in health-food stores. For the real thing, use the blend.
Why is my pinsa dense instead of airy?
Three usual suspects: under-fermentation (the dough needs the full 24+ hours cold — a same-day dough won’t open up), too much handling during shaping (pressing out the air bubbles instead of working them to the edges), or an oven that wasn’t hot enough (the blast of heat is what springs the crumb). Also check your hydration — if you held back water because the dough scared you, the crumb will be tighter. Trust the wet dough.
Can I freeze pinsa dough or par-baked pinsa?
Both. Freeze portioned dough balls after the cold ferment (thaw overnight in the fridge, then warm 2 hours before shaping), or — better — par-bake the ovals, cool completely, and freeze them stacked with parchment between. Par-baked ovals go straight from freezer to a hot oven with toppings; add 2–3 minutes to the finishing bake. This is the easiest way to keep pinsa in your weeknight rotation.
What’s the difference between pinsa and pizza al taglio?
Both are Roman, but they’re different products. Pizza al taglio (“by the cut”) is a thick, focaccia-like rectangular pizza baked in large trays and sold by weight — soft, airy, and substantial. Pinsa is thin, oval, crisp, and individually portioned, with the multi-flour blend and two-stage bake. Our pizza al taglio guide covers the tray-baked Roman style in detail.
Do I need a special oven or equipment to make pinsa?
No — a standard home oven with a baking steel or stone, preheated thoroughly, does the job. A bench scraper and a kitchen scale (for the flour ratios and hydration) are the only tools that really matter; high-hydration dough is unforgiving of volumetric measuring. No stand mixer required — the dough comes together with mixing and folds.
Conclusion: Why Pinsa Deserves a Spot in Your Rotation
Pinsa romana earns its hype the honest way: not through health claims or novelty, but through texture. That shattering crispness over an almost impossibly airy crumb is something standard pizza dough simply doesn’t do, and once you’ve had a well-made pinsa — the mortadella and pistachio version, preferably, still crackling from the oven — the oval shape stops looking strange and starts looking like the only sensible format. The home method takes planning (the dough needs its two days), but the actual work is minimal, and a freezer stash of par-baked ovals is one of the best weeknight weapons a pizza lover can have. Make the dough on Sunday, and you’ll be eating pinsa all week.