

There’s a particular kind of magic that happens when pizza meets live fire, and grilled pizza might be the most underrated way to get it at home. No dedicated pizza oven, no 900°F engineering marvel — just your backyard grill, a ball of dough, and a method that takes about fifteen minutes to learn. The payoff is a crust with real char and smokiness, blistered in spots the way only direct flame can do, with a chew and crispness that surprises everyone who assumes great pizza requires specialized equipment.
If you’ve never tried it, grilled pizza probably sounds like a gimmick or a disaster waiting to happen — dough falling through the grates, toppings sliding into the coals, a raw middle and a burnt bottom. Done wrong, those things absolutely happen. Done right, with the two-stage method this guide teaches, it’s nearly foolproof. The secret is counterintuitive: you don’t top a raw pizza and hope for the best. You grill the naked dough first, flip it, and only then add toppings to the already-cooked side. That single technique eliminates ninety percent of grilled-pizza failures, and once you’ve done it twice, you’ll wonder why you ever waited for oven preheat in July.
Beyond the flavor, there’s a practical case for moving pizza night outdoors. In summer, nobody wants a 550°F oven roaring in the kitchen. A grill keeps the heat outside, preheats faster than most ovens, and turns pizza-making into a social, stand-around-the-fire event instead of a solitary kitchen shift. Gas or charcoal both work beautifully, each with its own personality. Let’s get into the setup, the dough tweaks, and the step-by-step method.
🍕 Key Takeaways
- Grill the naked dough first, flip it, then top the cooked side — this two-stage method prevents raw centers and topping disasters.
- Set up two-zone heat: screaming-hot direct zone for charring, cooler indirect zone for finishing without burning.
- Gas grills offer easy temperature control; charcoal runs hotter and adds real smoke flavor — both make excellent pizza.
- Use a slightly sturdier dough with olive oil, stretch it a touch thicker than usual, and keep toppings light and pre-cooked.
- A pizza stone or steel on the grill works too, giving you oven-like even heat with a whisper of smoke.
- Clean, well-oiled grates and long-handled tools are non-negotiable — you’ll be working inches from serious heat.
Why Grilled Pizza Works So Well
A grill is, at heart, a high-heat cooking chamber with live fire character — which is closer to a real pizza oven than your kitchen oven in some important ways. The direct radiant heat from below chars and crisps the crust aggressively, creating those blackened bubbles and smoky notes that define great grilled pizza. Meanwhile, closing the lid traps hot air that circulates around the top, melting cheese and cooking toppings from above. It’s a crude but effective simulation of the deck-and-dome dynamic of a proper pizza oven.
Temperature is the other advantage. Most gas grills comfortably reach 500 to 600°F, and a well-built charcoal fire goes hotter still — territory where pizza thrives. That heat does in minutes what a home oven does in longer bakes: rapid oven spring, a crisped exterior, and cheese that melts before the crust over-bakes. And because the heat is so direct, grilled pizzas cook fast — typically 5 to 8 minutes total — which keeps the whole affair feeling spontaneous rather than procedural.
Then there’s the flavor that no oven can fake. Even a gas grill imparts a faint kiss of char, and charcoal or wood chunks add genuine smoke that weaves into the crust. It’s not the same as a wood-fired pizza oven — nothing quite is — but it’s a distinct, delicious thing in its own right, and it’s achievable on equipment millions of people already own. If you’re weighing dedicated equipment against working with what you have, our outdoor pizza oven guide covers the full landscape of wood, gas, and pellet options for comparison.
Gas vs Charcoal: Setting Up Your Grill for Pizza
Both fuels make excellent grilled pizza; they just ask for slightly different setups. Gas grills win on control: you can dial in medium-high heat, hold it steady, and create a two-zone layout by running half the burners hot and the other half low or off. Preheat with the lid closed for a solid 10 to 15 minutes until the thermometer reads 500°F or higher. The even, predictable heat makes gas the friendlier choice for your first few grilled pizzas.
Charcoal grills win on flavor and peak heat. Build a two-zone fire: bank lit coals to one side for the hot direct zone, leaving the other side empty or with just a few coals for gentle indirect heat. You’re aiming for a fire that’s past its roaring flare-up stage — ashy, glowing coals, not leaping flames. Tossing a handful of wood chunks (oak, hickory, or fruitwood) onto the coals adds a smoke layer that gas simply can’t match. Charcoal demands more attention — you’ll manage vents and may need to add coals during a long session — but the results reward the effort.
Whichever fuel you use, the two-zone layout is the whole game. The hot direct zone is for charring the dough; the cooler indirect zone is your safety valve for finishing a pizza whose bottom is done but whose top needs another minute. Without that cooler zone, you’re one flare-up away from a carbonized crust with cold cheese. Also essential: scrupulously clean grates. Old carbonized residue sticks to dough and tears it. Scrub the grates hot with a grill brush, then wipe them with an oil-soaked paper towel held in long tongs — do this right before each pizza, not just at the start of the session.
The stone-or-steel-on-the-grill alternative
If grilling dough directly on the grates sounds too adventurous, there’s a middle path: put your pizza stone or steel on the grill grates and bake on it, oven-style. Preheat the slab on the grill with the lid closed for 20 to 30 minutes, then launch topped pizzas onto it with a peel exactly as you would indoors. You get the even, conductive heat of the slab plus ambient smoke and outdoor convenience, with none of the grate-technique anxiety. It’s an excellent bridge method, and the slab protects the dough from flare-ups entirely.
Grilled Pizza Dough: Small Tweaks, Big Difference
You don’t need a special “grill dough” recipe — your favorite dough works — but a few adjustments make grill life dramatically easier. Start with our reliable how to make pizza dough method if you need a base recipe, then apply these tweaks. First, add olive oil to the dough if your recipe doesn’t include it: a tablespoon or two per batch makes the dough more pliable, less sticky, and more forgiving on hot grates, plus it encourages browning. Second, consider dropping hydration slightly — a 60 to 62% hydration dough (a bit firmer than the 65%+ favored for oven baking) is easier to stretch, transfer, and lay onto grates without sagging through.
Thickness matters more on a grill than in an oven. Stretch your rounds a touch thicker than you would for oven pizza — think a hearty Neapolitan-ish thickness rather than cracker-thin. Ultra-thin dough chars before the toppings cook and tears more easily during the flip. A slightly puffier round is sturdier, chars beautifully on the outside while staying tender inside, and stands up to the direct heat. For stretching technique that won’t tear, our guide on how to stretch pizza dough covers the hand positions that matter.
Portion and shape with the grill in mind. Individual 8- to 10-inch pizzas are far easier to manage on a grill than one giant 16-incher — they flip cleanly, cook evenly, and let everyone customize their own. Oblong or rustic shapes are fine; perfect circles are unnecessary outdoors. Keep a floured peel or a rimless baking sheet nearby for transport, and have all your toppings prepped and within arm’s reach before the dough hits the heat. Grilled pizza moves fast, and there’s no pausing to chop basil while dough chars.
How to Grill Pizza, Step by Step
Here’s the method, refined over countless backyard sessions. Read it once fully before lighting the grill — timing matters and you won’t want to be reading mid-bake.
Step 1: Prep everything. Make your dough balls, stretch each to 8–10 inches, and lay them on a floured surface. Prep all toppings: sauce in a bowl, shredded cheese, sliced vegetables, cooked meats. Raw meats are a bad idea on grilled pizza — the bake is too fast to cook them safely — so pre-cook sausage, chicken, or bacon. Brush one side of each dough round lightly with olive oil; this is the side that hits the grates first.
Step 2: Preheat and clean. Get the grill to 500°F+ with the lid closed, two-zone setup ready. Scrub grates clean and oil them with the tongs-and-paper-towel method. Lay out your tools: long tongs, a wide spatula, and heavy mitts.
Step 3: Grill side one. Lay a dough round oiled-side-down directly on the hot grates over the direct zone. It will puff, bubble, and char-mark within 1 to 3 minutes. Watch it constantly — lift an edge with tongs to check. You want defined char marks but not full blackening. This is also when the dough firms up enough to handle easily.
Step 4: Flip and move. Flip the round onto the cooler indirect zone, grilled-side up. Working quickly, brush the top lightly with olive oil, spread a thin layer of sauce, and add toppings. Remember: less is more. A heavy pile of wet toppings is the number one cause of soggy grilled pizza — keep it restrained, and if you need sauce inspiration, our homemade pizza sauce recipe is thick enough to behave on a grill. For cheese strategy, low-moisture mozzarella melts cleaner than fresh in this fast, hot environment, as explained in our best cheese for pizza guide.
Step 5: Close the lid and finish. Shut the lid and let ambient heat melt the cheese and finish the top, 2 to 4 minutes. Peek after two minutes. If the bottom is charring too fast, slide the pizza fully into the indirect zone; if the top needs more, leave the lid closed a little longer. You’re looking for melted, bubbling cheese and a bottom that’s charred in spots but not bitter.
Step 6: Rest and serve. Slide the finished pizza onto a cutting board and let it rest 1 to 2 minutes — this sets the cheese and keeps the crust crisp. Then slice and serve immediately. Repeat, re-oiling the grates between each pizza, and enjoy the rhythm: by the third round you’ll be running the grill like a pizzeria line.
Troubleshooting the tricky moments
Dough sticking to the grates usually means the grates weren’t clean enough, weren’t oiled, or weren’t hot enough — dough releases naturally once it’s seared, so give it a full minute before attempting to move it. A raw, doughy center with a charred bottom means your direct zone is too hot or the dough was too thick in the middle; move to indirect heat sooner and stretch more evenly. Toppings sliding off during the flip? You topped too early — remember, toppings go on after the flip, never before. And if flare-ups erupt from dripping cheese, just slide the pizza to the indirect zone until they subside; a grill with a lid closed starves flames of oxygen quickly.
Toppings That Love the Grill
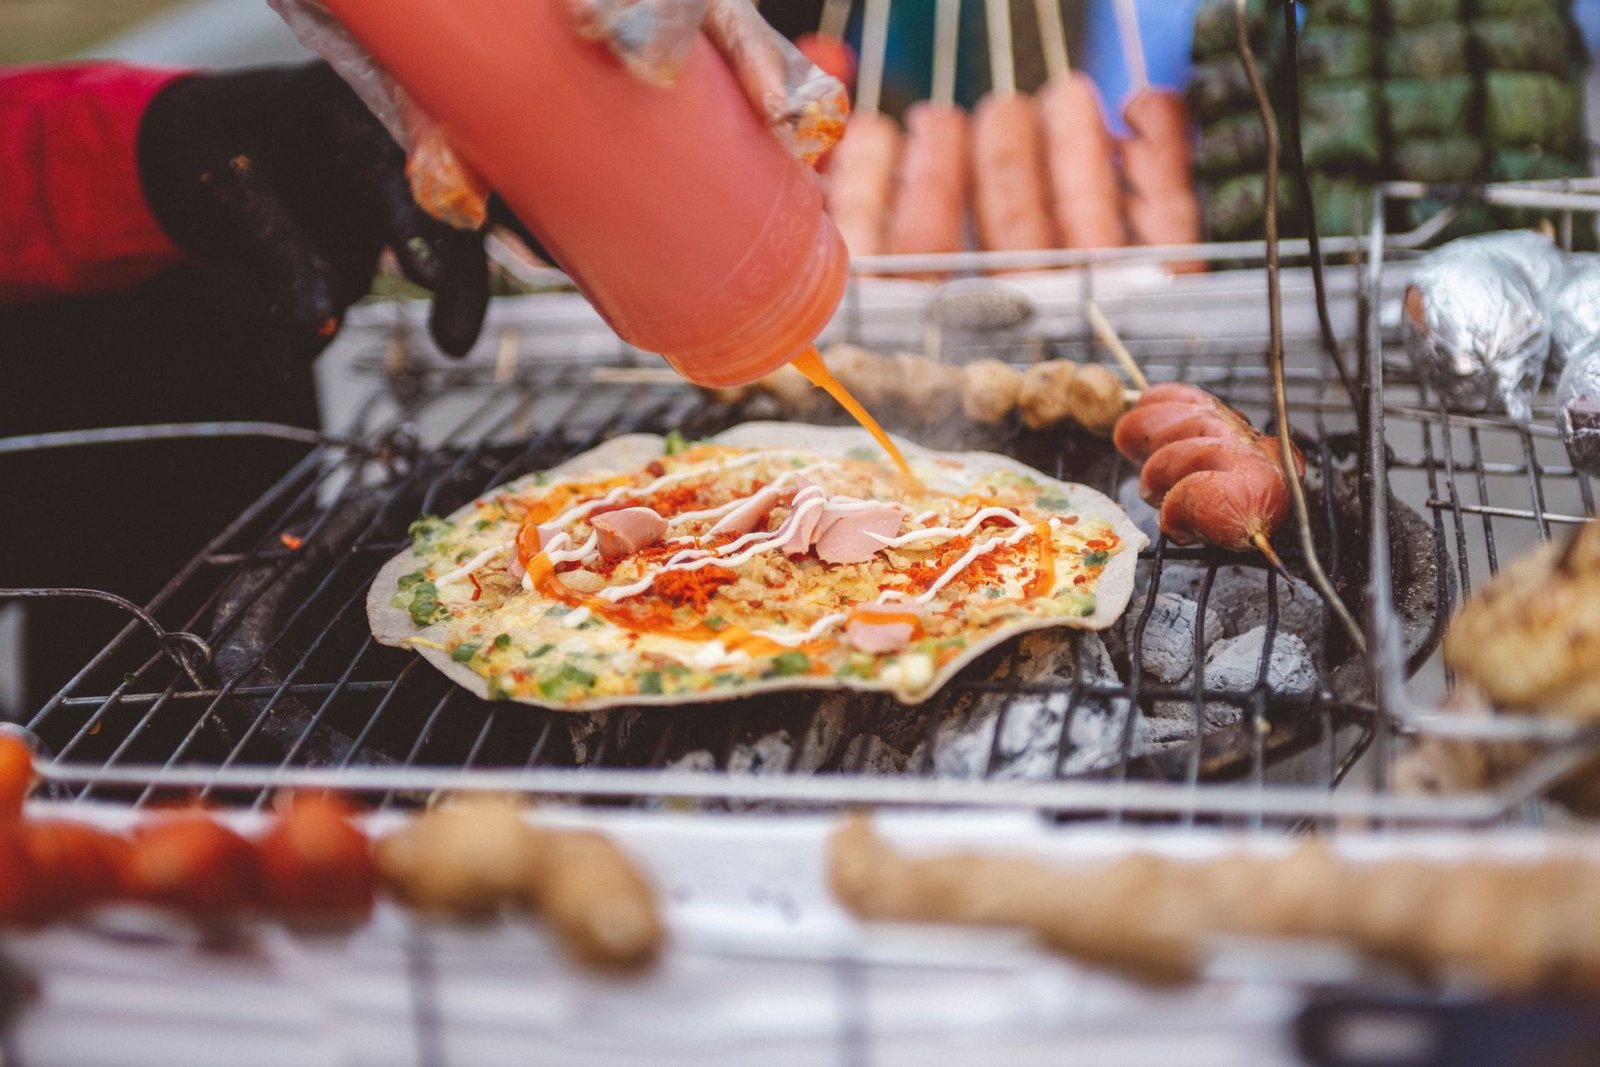
The grill rewards bold, simple topping combinations and punishes the fussy. Because the bake is fast and the crust brings smoke and char, you don’t need twenty ingredients — a few great ones shine. Classic margherita (crushed tomato, fresh mozzarella added in the last minute, basil after grilling) is arguably better grilled than oven-baked. BBQ chicken with red onion and smoked gouda leans into the smoke beautifully. Grilled vegetables — zucchini, bell peppers, red onion, mushrooms — can go straight from the grates onto the pizza, their char echoing the crust’s.
A few topping rules specific to grilled pizza: pre-cook anything raw except quick-cooking vegetables sliced thin. Go lighter on sauce than you would indoors — excess moisture plus direct heat equals a soggy middle, the same principle behind our guide to preventing soggy pizza. Add delicate herbs and fresh mozzarella after grilling, not before, so they don’t scorch. And embrace the char — a little blackening on peppers, onions, and crust edges isn’t a flaw here, it’s the entire point. Keep a few trusted topping combinations in your back pocket and don’t be afraid to improvise.
Hosting a Pizza Party on the Grill: Running the Line
Grilled pizza might be the single best format for feeding a crowd, because the grill naturally becomes a theater — guests gather around, watch their pizza char, and the cook becomes the evening’s entertainment. But a backyard pizza line needs a system, or you’ll spend the night frazzled while dough over-proofs on the counter. Here’s how to run it smoothly.
Set up stations before anyone arrives. You need three zones: a stretching station (floured surface, rolling pin for the dough-shy, extra flour), a topping bar (sauces, cheeses, pre-cooked meats, sliced vegetables, herbs, oils — everything in bowls with spoons), and the grill itself with all tools laid out. Keep dough balls at room temperature, covered, for at least an hour before stretching; cold dough fights you and tears. Plan quantities with a per-person slice estimate so nobody goes hungry and you’re not drowning in leftovers.
Assign roles and keep the rhythm. The smoothest setup has one person stretching, one person on the grill, and guests building their own pizzas at the topping bar. Each pizza takes 5 to 8 minutes on the grill, so with one grill you can realistically serve 6 to 8 pizzas an hour — plenty for a party if you also put out salads and appetizers. Have guests write their names on a little card next to their creation if the crowd is big; it prevents the eternal “whose is this?” hovering.
Mind the grill’s stamina. On gas, there’s nothing to manage — just keep the lid closed between pizzas. On charcoal, bank extra unlit coals to the side at the start so you can nudge fresh ones onto the fire halfway through the evening without a relighting drama. A chimney starter with a fresh batch ready to go is the pro move for parties longer than two hours. And pace yourself: the grill master who also tries to socialize, stretch dough, and manage toppings simultaneously is the grill master whose fourth pizza becomes a frisbee. Delegate, sip something cold, and enjoy the fire.
Frequently Asked Questions
Can you really put pizza dough directly on grill grates?
Yes — that’s the classic grilled-pizza method. The trick is hot, clean, well-oiled grates and grilling the naked dough first before flipping and topping. The dough sears and firms within a minute or two, after which it handles like a sturdy flatbread. If the idea still makes you nervous, a stone or steel on the grill gives you the same outdoor experience with oven-like forgiveness.
What temperature should the grill be for pizza?
Aim for 500°F or higher, measured with the lid closed. That heat gives you fast charring and good oven spring. Much lower and the dough dries out before it crisps; much higher on the direct zone and the bottom burns before the top finishes — which is exactly why the two-zone setup matters.
Do I need a pizza stone to grill pizza?
No. Direct-on-the-grates is the traditional method and produces the smokiest, most charred result. A stone or steel on the grill is an optional alternative that makes the process more like oven baking — more even, less smoky, and easier for beginners. Both are legitimate grilled pizza.
Why did my grilled pizza stick to the grates?
The three usual culprits: grates that weren’t fully clean, grates that weren’t oiled right before the dough went on, or grates that weren’t hot enough. Dough bonds to cool or dirty metal but releases from screaming-hot, oiled grates once seared. Also, don’t try to move the dough in the first 60 seconds — let the sear form, then check.
Can I grill frozen pizza?
It’s not ideal. Frozen pizzas are engineered for even oven heat, and the intense direct heat of a grill usually burns the bottom before the frozen center thaws and cooks. If you must, use the indirect zone with the lid closed and expect a longer, gentler bake — or better, dress it up with fresh toppings and bake it indoors instead.
How do I keep the grill from flaring up?
Trim excess cheese near the edges, avoid sugary sauces that drip and ignite, and keep the lid closed as much as possible — closing the lid starves flames of oxygen. If a flare-up starts, slide the pizza to the indirect zone until it passes. A spray bottle of water is a last resort; use it sparingly, since water on coals creates ash and steam.
Conclusion
Grilled pizza earns its place in every home baker’s repertoire: smoky, charred crusts, a fast and social cooking process, and zero need for specialized equipment. Remember the core method — grill the naked dough, flip, top lightly, finish with the lid closed — and respect the two-zone setup, and you’ll turn out backyard pizzas that rival anything from your oven. For more ways to cook pizza beyond the kitchen, explore our ovens and equipment guides. Fire up the grill this weekend — your best pizza summer is one hot grate away, and once you taste that first smoky, blistered slice, the indoor oven will feel like a backup plan.